Since my kids don’t like to cook with me (I’m so bummed), I wanted to come up with Halloween crafts they would enjoy. They really had fun working with me on this project (maybe because there was a glue gun involved?) to create these adorable Halloween Spooky Spider Treat Bags. They are decorative as well as a charming way to give out as treats for kids.
Halloween Treats for Kids
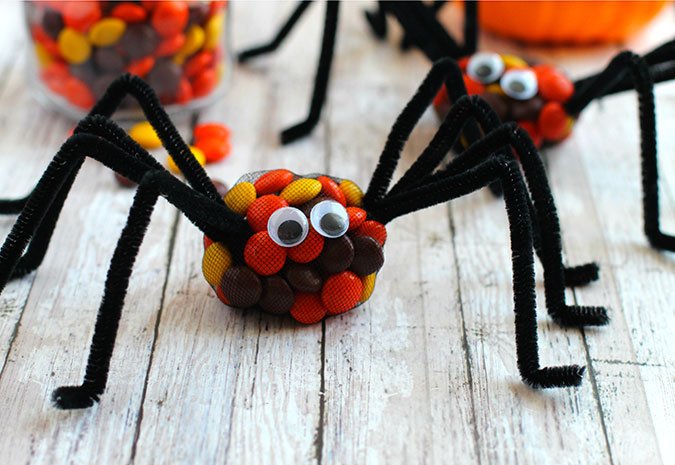
Use these spooky spiders as table decorations around a pumpkin centerpiece or on top of each plate at a table setting for a kids’ Halloween party. Set them all on a white tray and let kids choose their own spider shaped treat! No two of these will be exactly alike, so it’s fun to let them pick one!
These spooky spider treat bags are a perfect presentation for teachers’ gifts, too. Or surprise your co-workers and place one on each of their desks before they get to work. Who wouldn’t love one? There’s a little kid in all of us.
YES! I LOOK FORWARD TO #GROWINGYOUNGER
PLEASE SUBSCRIBE ME TO YOUR MAILING LIST.
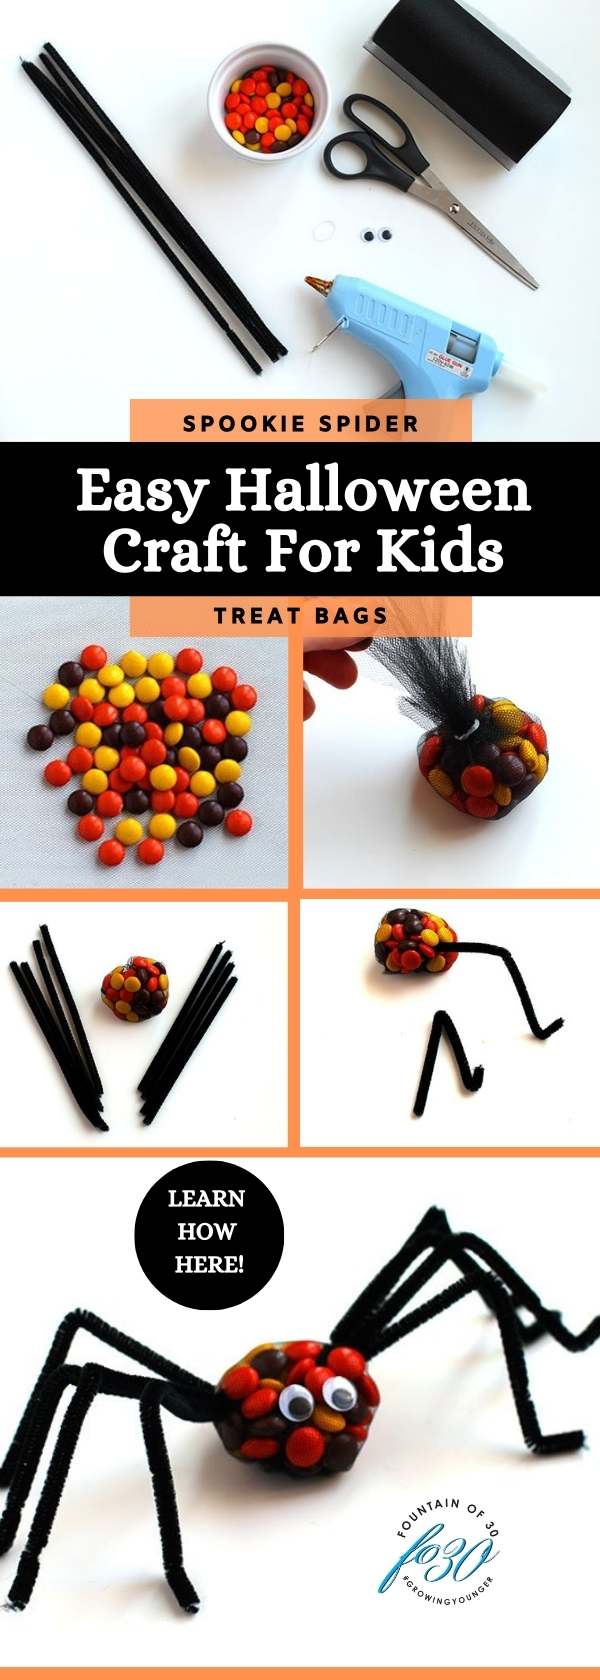
Easy Halloween Craft
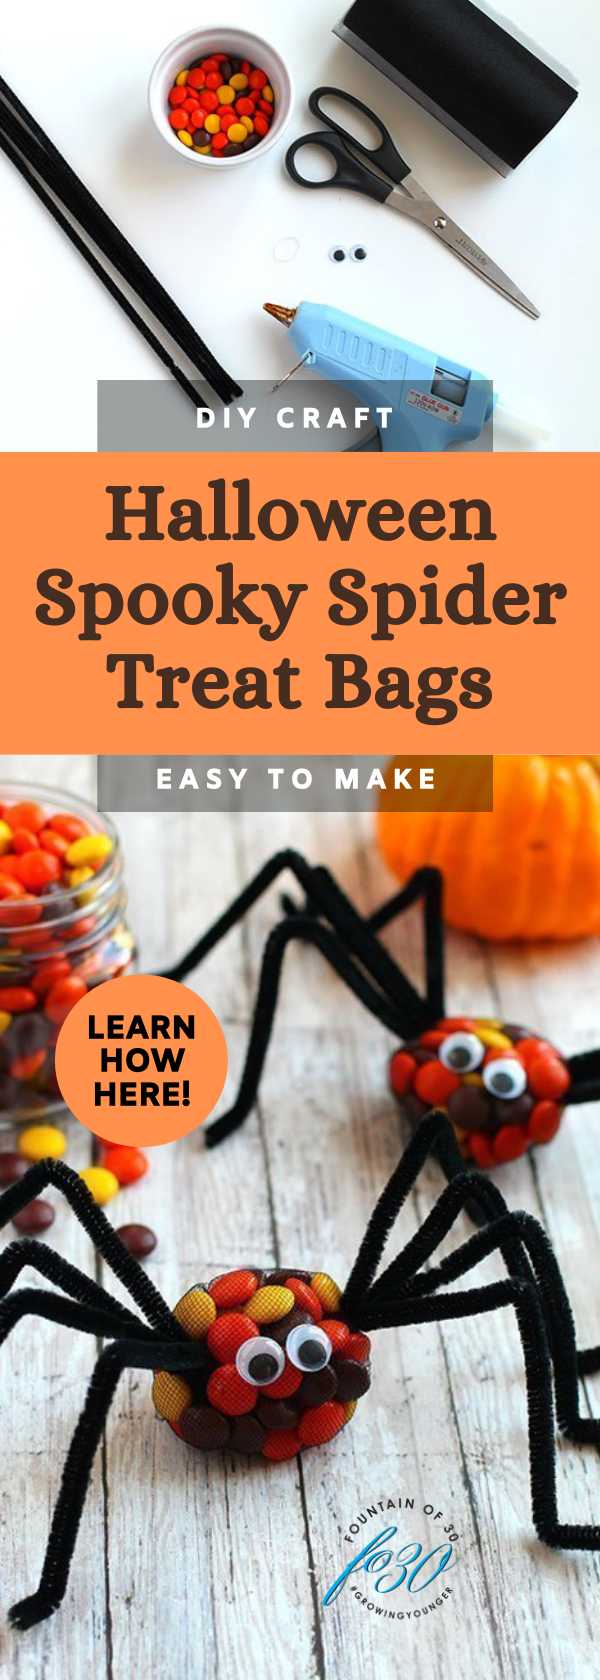
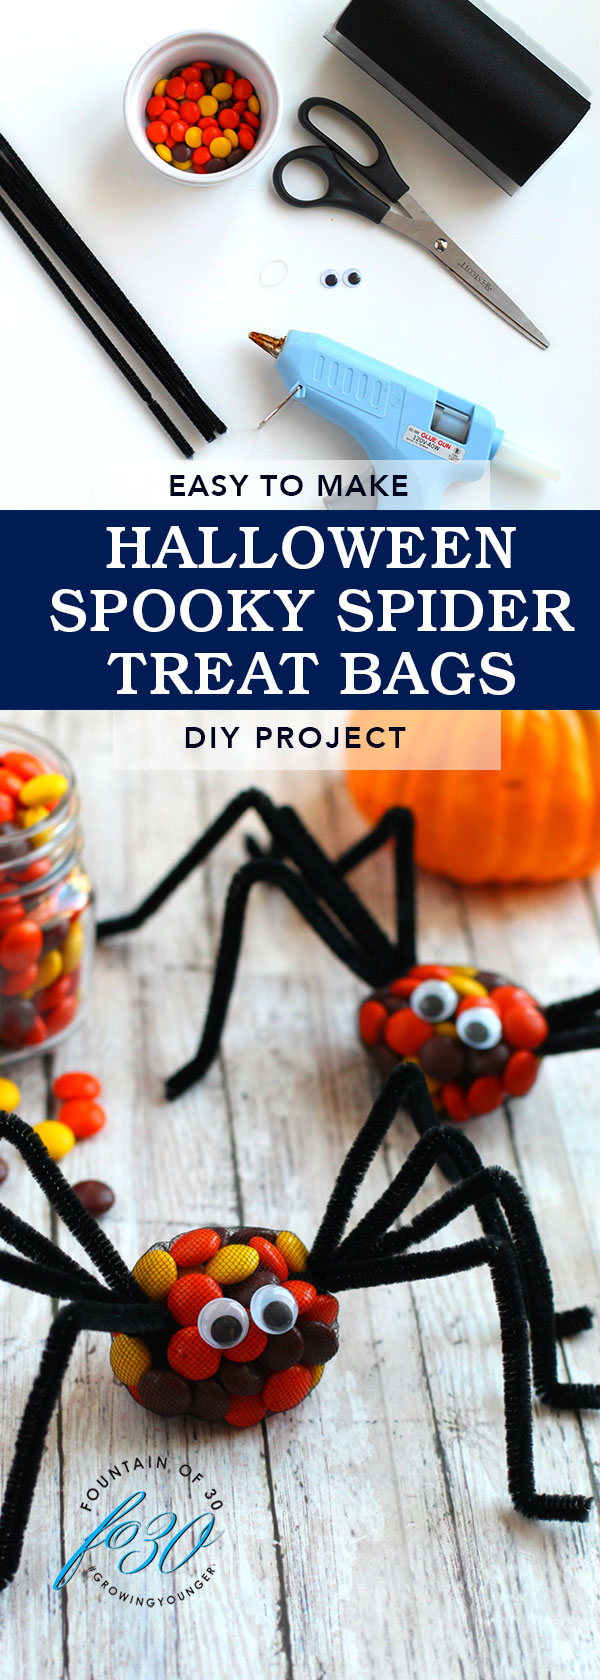
This DIY Halloween project is super easy and I was able to purchase practically everything I needed at Target and found the black pipe cleaners and tulle at Michael’s. You can also try Walmart and other superstores or drugstores if you prefer. Or order online with the links I provided below. Additionally, they are a perfect no-bake treat.
Spend Quality Family Time
You can spend some quality family time together and have a lot of laughs while you make these Spooky Spiders. Depending on their ages, your kids will love to watch or they can participate, too. My sons and I discussed that most insects have 6 legs but spiders have 8, and got into a big conversation about bugs and spiders. I was “the glue gun master” for my family because gluing the spider’s eyes on was the only part of the process where I wanted “quality control” over the project. That made us laugh even more as we created our own assembly line.
Reese’s Pieces and Other Candies
You can use other small round candies like M&Ms or Skittles but I like using Reese’s Pieces because the colors are more festive for Halloween. And they are a little less likely to melt than chocolate. Other candies do come out with Halloween colors this time of year, so you can be on the look-out for other options. I considered candy corn (because I love it) but the shape is too pointy! Round or pebble shape candies with coated shells work best to make these treat bags.
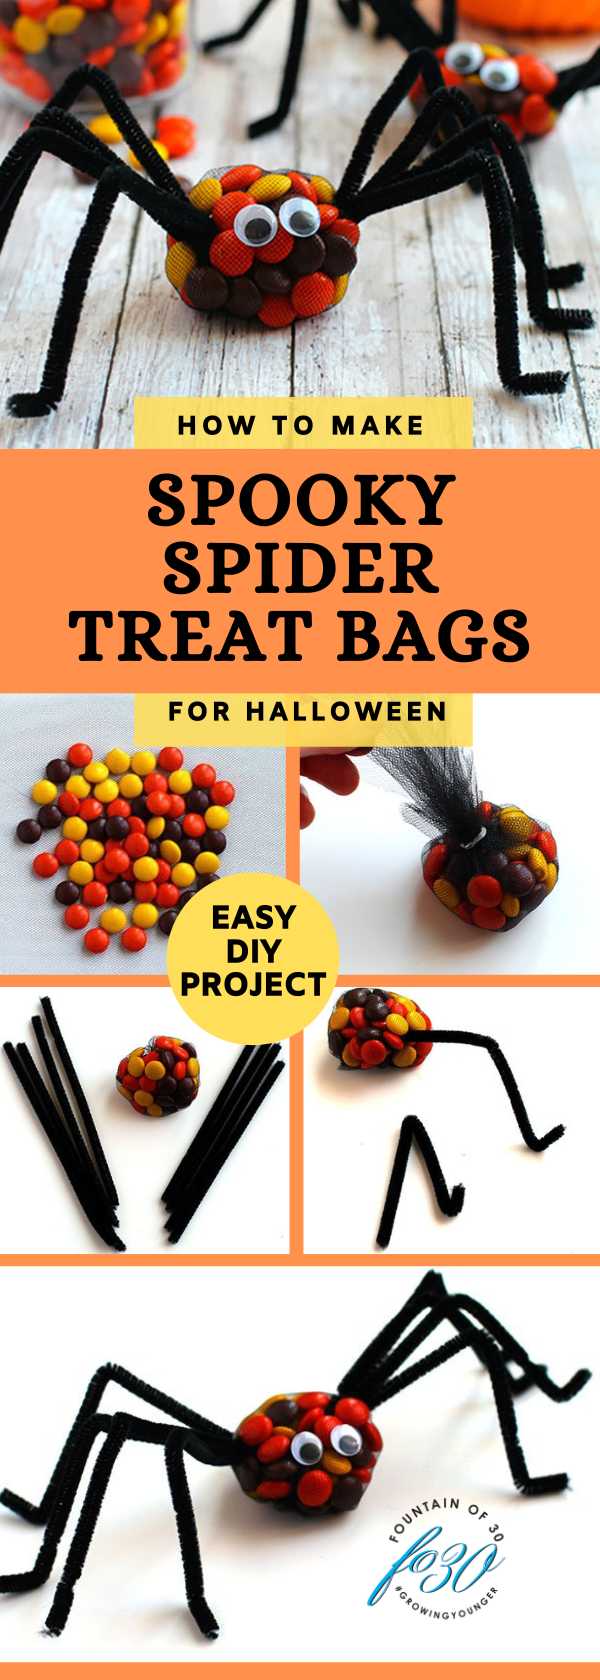
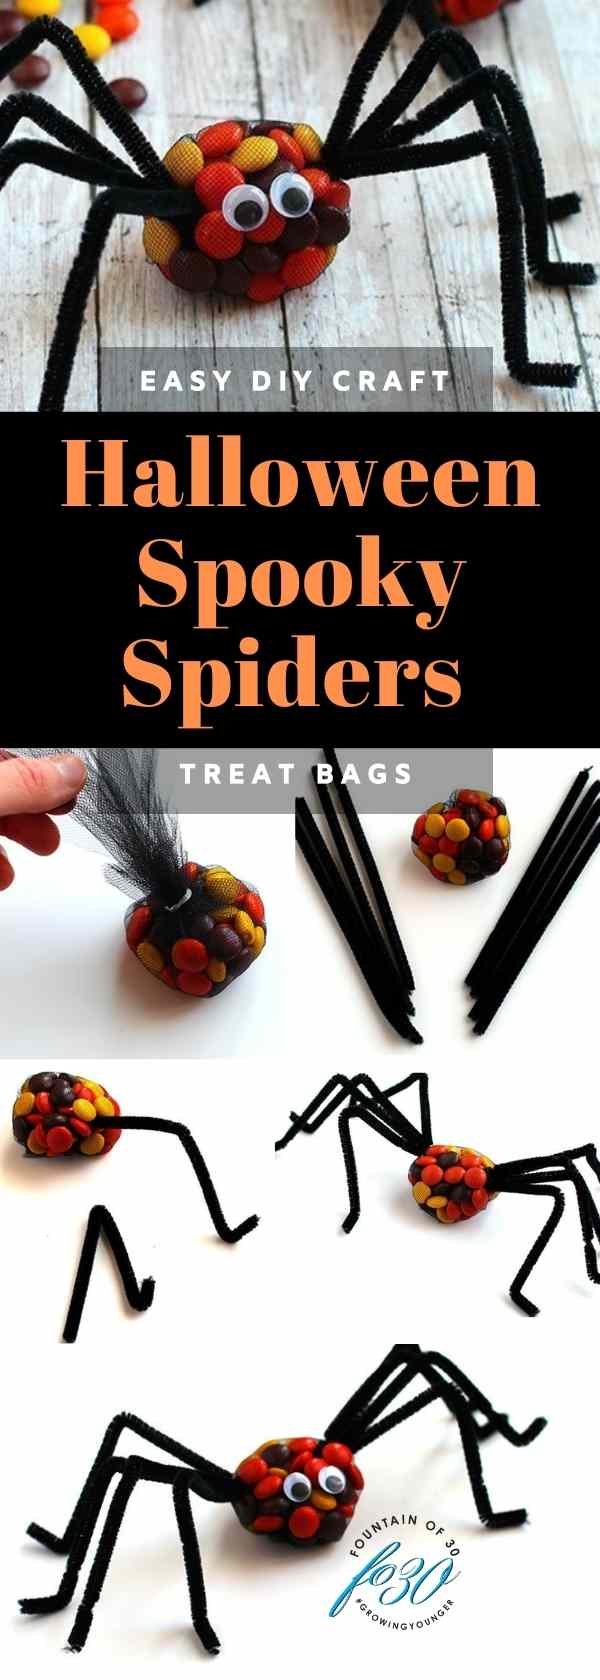
How To Make Spooky Spider Treat Bags

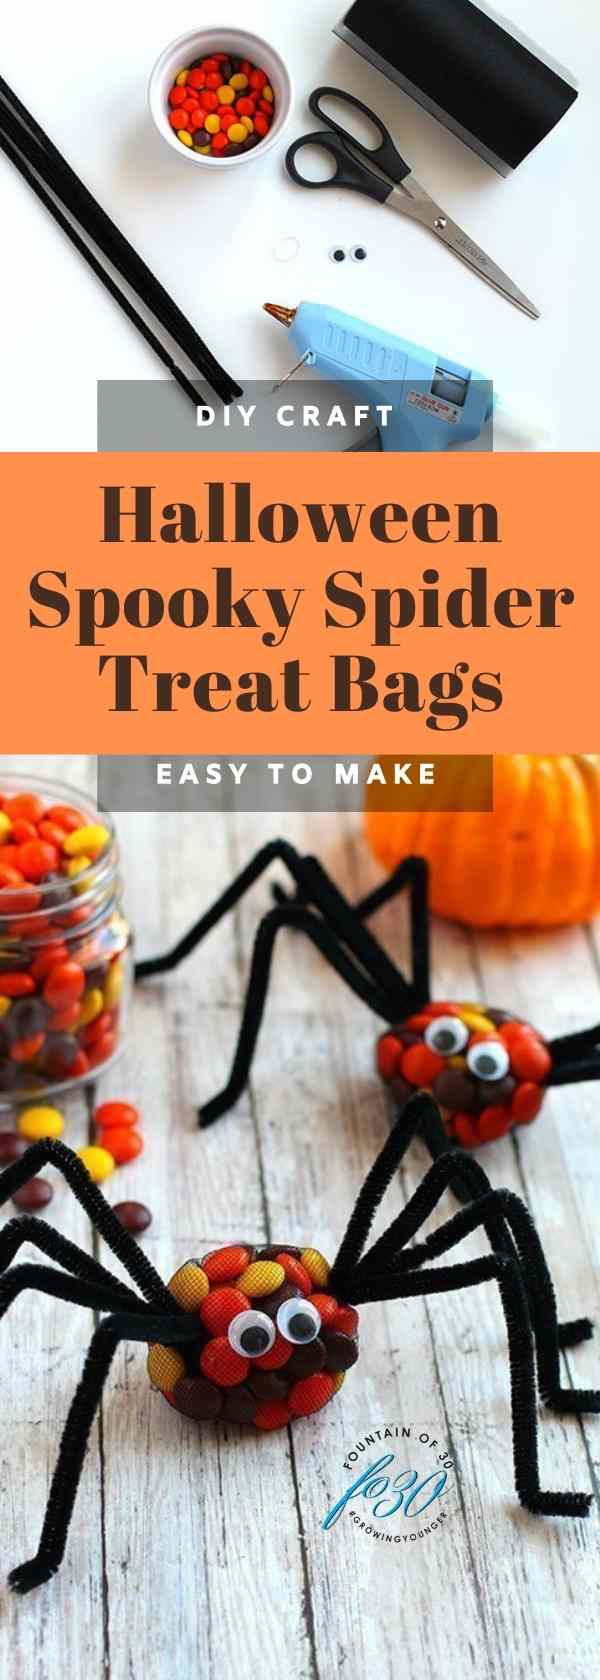
Materials:
Black tulle
Black pipe cleaners
Reese’s Pieces candy
Wiggle Eyes
Scissors
Clear hair elastics
Hot Glue Gun or Glue Dots
Directions:


1. Start by laying a 12” piece of tulle on a flat surface. Pour about ¼ cup of Reese’s Pieces candy in the center. Pull all of the sides up together and tie a clear hair elastic around the tulle. Wrap around a couple of times so it creates a tight closure – ensuring none of the candy is able to fall out. Trim off most of the excess tulle.

2. Place the bag of candy on a flat surface with the elastic tie hidden in the back towards the bottom. Use scissors to cut four black pipe cleaners in half.


3. Bend and shape each piece into a spider leg. Push one leg through the side of the treat bag to create a small hole. Add three more pipe cleaner spider legs into the same hole. Repeat this process for the opposite side so all eight spider legs are attached to the treat bag.

4. Next, use a hot glue gun or glue dots to add two wiggle eyes to the front of the bag. You want to be sure not to get any glue on the candy. You can do this by carefully pulling the tulle away from the candy and adding each eye – allowing the glue to dry before letting the tulle snap back into place. Note: Self adhesive wiggle eyes may not stick on their own so a glue gun or glue dots are recommended.
5. Repeat this process until you have as many treat bags as you need.

Shop Spooky Spider Halloween Treats Materials Here!

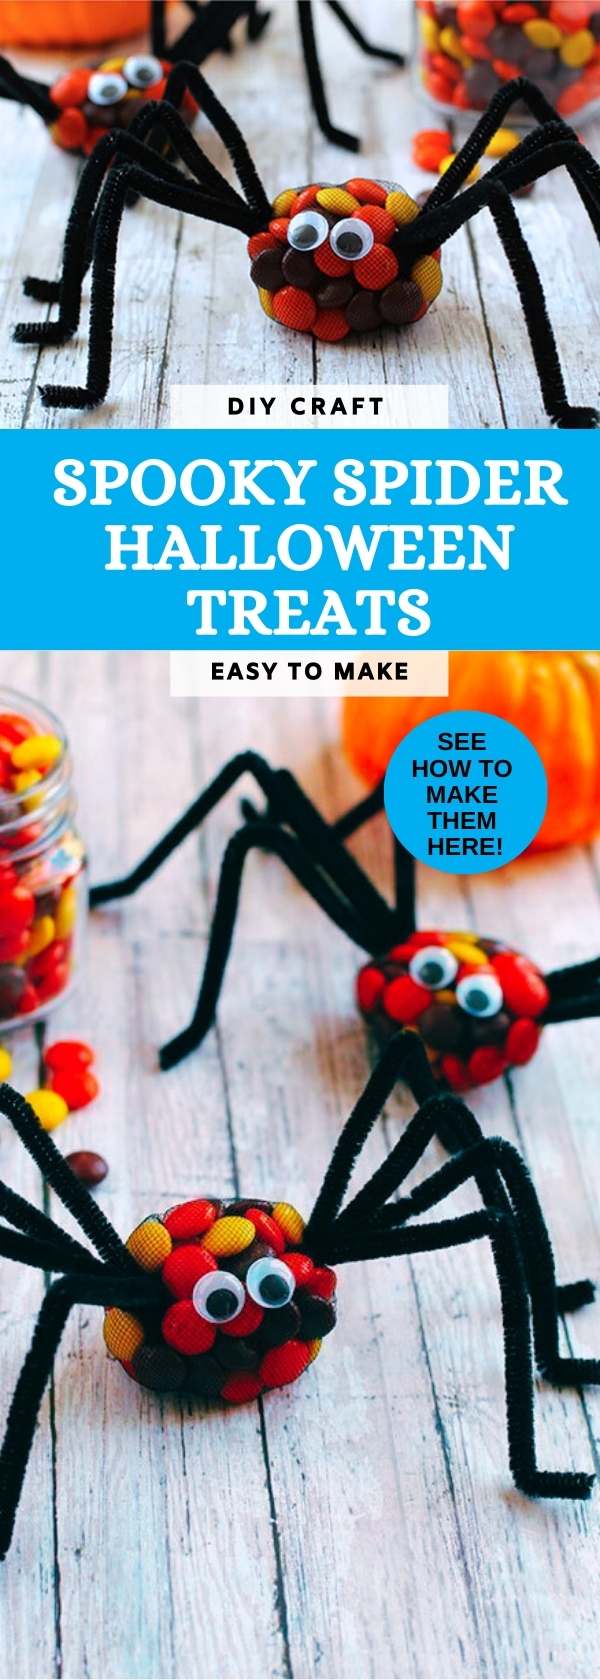
Spooky Spider Treat Bags
This DIY Halloween project is easy and fun for kids to watch or make. Affordable store-bought candy and a few additional materials create adorable Halloween treats!
Materials
- Black tulle
- Black pipe cleaners
- Reese’s pieces candy
- Wiggle Eyes
- Clear hair elastics
Tools
- Scissors
- Hot Glue Gun or Glue Dots
Instructions
- Start by laying a 12” piece of tulle on a flat surface. Pour about ¼ cup of Reese’sPieces candy in the center. Pull all of the sides up together and tie a clear hair elastic around the tulle. Wrap around a couple of times so it creates a tight closure - ensuring none of the candy is able to fall out. Trim off most of the excess tulle.
- Place the bag of candy on a flat surface with the elastic tie hidden in the back towards the bottom.
- Use scissors to cut four black pipe cleaners in half. Bend and shape each piece into a spider leg. Push one leg through the side of the treat bag to create a small hole. Add three more pipe cleaner spider legs into the same hole. Repeat this process for the opposite side so all eight spider legs are attached to the treat bag.
- Next, use a hot glue gun or glue dots to add two wiggle eyes to the front of the bag. You want to be sure not to get any glue on the candy. You can do this by carefully pulling the tulle away from the candy and adding each eye - allowing the glue to dry before letting the tulle snap back into place.
- Repeat this process until you have as many treat bags as you need.
Notes
Self adhesive wiggle eyes may not stick on their own, so a glue gun or glue dots are recommended.

You may also like to see How To Make These Cute Spooky Spider Lollipops Halloween Treats and Holiday Gift Wrapping: DIY Unique Recycled Gift Tags
This post contains affiliate links which may give us a commission at no additional cost to you.
Are you following Fountain Of 30 on Facebook, X, Instagram and Pinterest? We’ve got lots going on, so join in on the fun! Subscribe to our newsletter here. You don’t want to miss a post and promise not to bug you to death. Join our Facebook Group called Growing Younger where women discuss everything good and bad about being over 50. Additionally Lauren hosts a bi-weekly podcast called Beauty is a Bitch! and an Instagram Live series called “Growing Younger Gabfest with Lauren.”
Please pin!
These are adorable! And easy, to boot. My grandsons will enjoy making these. Thank you for sharing!
Yeah! I hope they enjoy making them as much as my boys! Of course they wanted the glue gun! 😉